
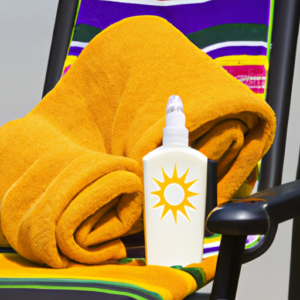
Ready to Glow? Let’s Talk About Self-Tanners
Hey there, fellow beauty enthusiasts! Today, we’re going to tackle a topic that’s on everyone’s mind – self-tanners! If you’re wondering what self-tanners are, they’re basically products that give your skin a sun-kissed glow without exposing it to harmful UV rays. Who wouldn’t want that, right?
Using self-tanners has a ton of benefits! First and foremost, it’s a safe and easy alternative to tanning beds, which have been linked to skin cancer. Secondly, you can achieve a gorgeous bronzed look regardless of the weather or season. Lastly, it provides an alternative to makeup cover-up, ideal if you have skin blemishes that you want to conceal, while still achieving a natural look.
Get Your Skin Ready: Preparing for Self-Tanning
Before applying self-tanner, it is crucial to take the time to prepare your skin properly. This step can make a significant difference in the overall appearance and longevity of your tan. Here are my top tips for getting your skin ready for a beautiful, even self-tan.
Exfoliating
Exfoliating is a crucial step in preparing your skin for self-tanning. It helps to remove dead skin cells and create a smooth, even canvas for the tan to be applied. I recommend exfoliating at least 24 hours before applying self-tanner to give your skin time to recover and avoid any irritation. Use a gentle scrub or exfoliating mitt to buff away any rough patches of skin, paying extra attention to dry areas like elbows, knees, and ankles.
Moisturizing
Keeping your skin hydrated is also important before applying self-tanner. Dry skin can cause the tanner to appear uneven or blotchy, so it is crucial to moisturize regularly in the days leading up to application. However, be sure to avoid oil-based moisturizers, as they can create a barrier on the skin and prevent the tan from absorbing properly. Instead, opt for a lightweight lotion or serum to keep your skin hydrated and healthy.
My Fool-Proof Application Tips for Perfect Self-Tanning
Choosing the right product is crucial for achieving a flawless tan. I always opt for a gradual self-tanner which allows me to build up my color gradually without any patchiness. Before starting with the application, prep your skin by exfoliating and moisturizing. This step is crucial as it removes any dead skin cells that could create uneven patches, and moisturizes skin, preventing the tan from sticking and developing too dark in certain areas.
When applying the self-tanner, I always start at the ankles and work my way up. I use circular motions with my tanning mitt to ensure that the product is spread evenly. It’s essential to pay close attention to the hands, feet, elbows, and knees, as these areas can often turn out darker than the rest of the body. Don’t forget to blend the product into the hairline and behind the ears for a more natural look.
Once the self-tanner is dry, wear loose clothing to avoid rubbing off the product. Keep your skin hydrated by using an oil-free body lotion or moisturizer, as well as drinking plenty of water. The better care you take of your newly tanned skin, the longer-lasting your tan will be! When it comes to removing self-tanner, I recommend using a body scrub on damp skin. It will exfoliate the tan away gradually, leaving your skin smooth and even.
With these tips, you’ll be sure to achieve a natural, flawless tan that will last weeks longer than your vacation!
Maintenance and Removal
Now that you’ve successfully applied your self-tanner, it’s important to keep your skin hydrated to maintain your tan. I recommend using a moisturizer that contains aloe vera or other hydrating ingredients. Applying moisturizer regularly will not only keep your tan looking fresh, but it will also prevent your skin from drying out and peeling.
Unfortunately, self-tanner doesn’t last forever, and at some point, you may want to remove it. One way to do this is to exfoliate your skin gently using a loofah or exfoliating scrub. This will help to break down the tan and remove it from your skin. However, if you want to remove the tan quickly, you can use a self-tanner removing product.
There are many different types of self-tanner removal products available, including wipes, sprays, and lotions. When choosing a product, it’s important to read the instructions carefully and follow them precisely for the best results. Some removal products may require you to leave them on for several hours before washing them off, while others may work in just a few minutes.
Remember, the key to keeping your self-tan looking great is to moisturize regularly and be gentle when removing it. With these tips, you’ll be sure to have a beautiful, long-lasting tan that you can be proud of.
Wrapping Up: The Finishing Touches of Self-Tanning
So there you have it, folks! Your ultimate guide to achieving a stunning, flawless faux glow. By following the tips and tricks outlined in this article, you can confidently create a beautiful tan that will make you look and feel fabulous. Remember, self-tanning is a process that requires care and attention, so don’t be discouraged if it takes a few tries to perfect your technique.
As a final word of advice, make sure to maintain your skin’s hydration level. Moisturizing is key to keeping your skin soft and supple, and will help prolong the life of your self-tan. Additionally, when it’s time to remove your tan, use a gentle exfoliant to avoid irritation and breakouts.
Take these tips to heart and enjoy your best summer yet! And for more in-depth tips on keeping your skin healthy and glowing all season long, check out Brightside Beauty’s Summer Skin Care Routine Tips.